
How Sela Projects Turns a 3D File Into a Physical Model – File Types, Process, and Production Overview
In the world of engineering, architecture, and professional model-making, every project begins with an accurate 3D file. At Sela Projects, we specialize in transforming these digital CAD files into physical, high-quality models — from preparing the file, adapting it for production, and all the way to creating a finished printed model.
This article explains the different file types and outlines the full workflow from receiving the file to producing a finished 3D-printed part.
Common 3D File Types in the Industry
CAD Files
CAD (Computer-Aided Design) files are engineering documents used for industrial design, architecture, and manufacturing. They contain precise 2D or 3D geometric information.
X_T Files
A variation of CAD files stored in text format. Although they appear as text files, the data represents a full 3D model when opened in the appropriate software.
STP / STEP Files
A highly accurate 3D CAD format widely used in engineering and manufacturing. It preserves precise geometric data, making it ideal for CNC machining, engineering workflows, and technical production.
OBJ / STL Files
These formats are polygon-based, making them easier to edit inside 3D design software.
OBJ and STL are the standard formats used for 3D printing.
Preparing a 3D File for Production and 3D Printing
Not every CAD file is ready for 3D printing. Before printing, the model must undergo several adjustments to ensure structural strength, proper scaling, and printability.
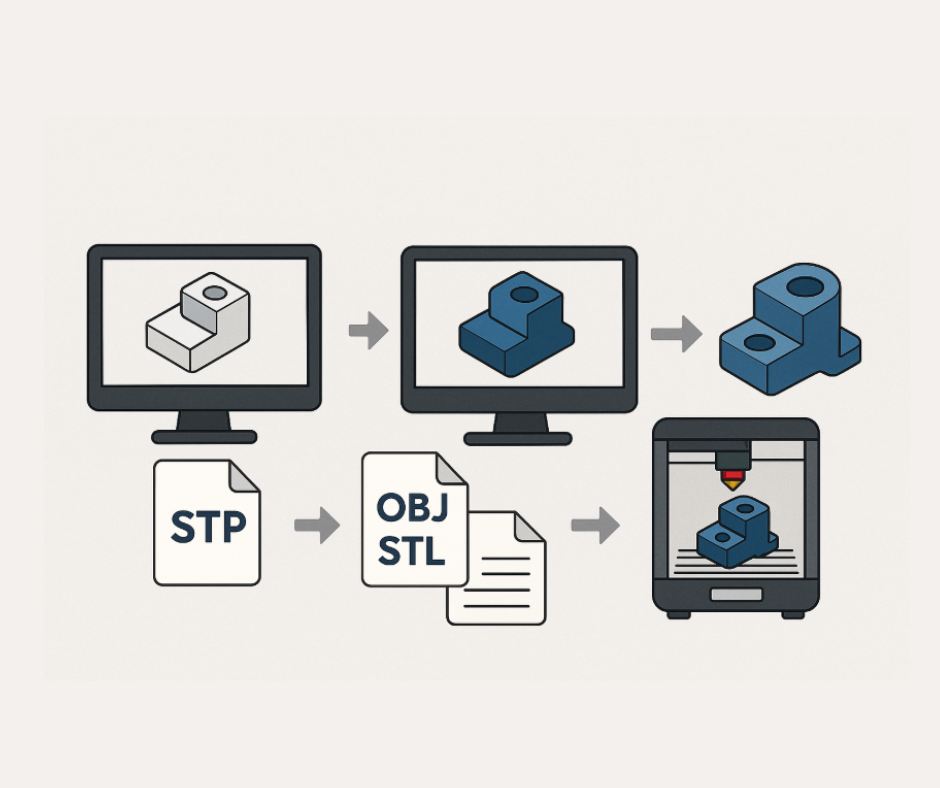
Step 1: Convert the X_T File to an STP File
This step transforms the text-based model into a fully defined 3D geometric object.
Step 2: Convert the STP File to an OBJ or STL File
STP files are extremely detailed but less convenient for editing, so they are converted to OBJ/STL formats that allow easier manipulation and correction.
Step 3: Edit and Prepare the 3D Model for Printing
Before the model can be printed, the following adjustments are usually required:
-
Thickening thin areas to prevent breakage
-
Scaling up very small details that cannot be printed at miniature size
-
Hollowing the model to reduce weight and prevent stress on the printer
-
Fixing geometry issues, such as closing holes, repairing surfaces, and ensuring watertightness
Step 4: Slicing the File for 3D Printing
The slicing stage converts the 3D model into hundreds or thousands of thin layers.
Supports are added to ensure structural stability during printing.
Step 5: 3D Printing the Model
The printer builds the object layer by layer until the full model is formed.
After printing, the model undergoes:
-
Cleaning
-
Support removal
-
Surface finishing or further processing, depending on the project
Conclusion – Bringing Digital Concepts to Life
At Sela Projects, transforming digital 3D files into physical, professional models is a refined process that combines engineering expertise, advanced file preparation, and cutting-edge production technologies.
From CAD conversion to final finishing, every step is crafted to deliver accurate, high-quality results for every project.